


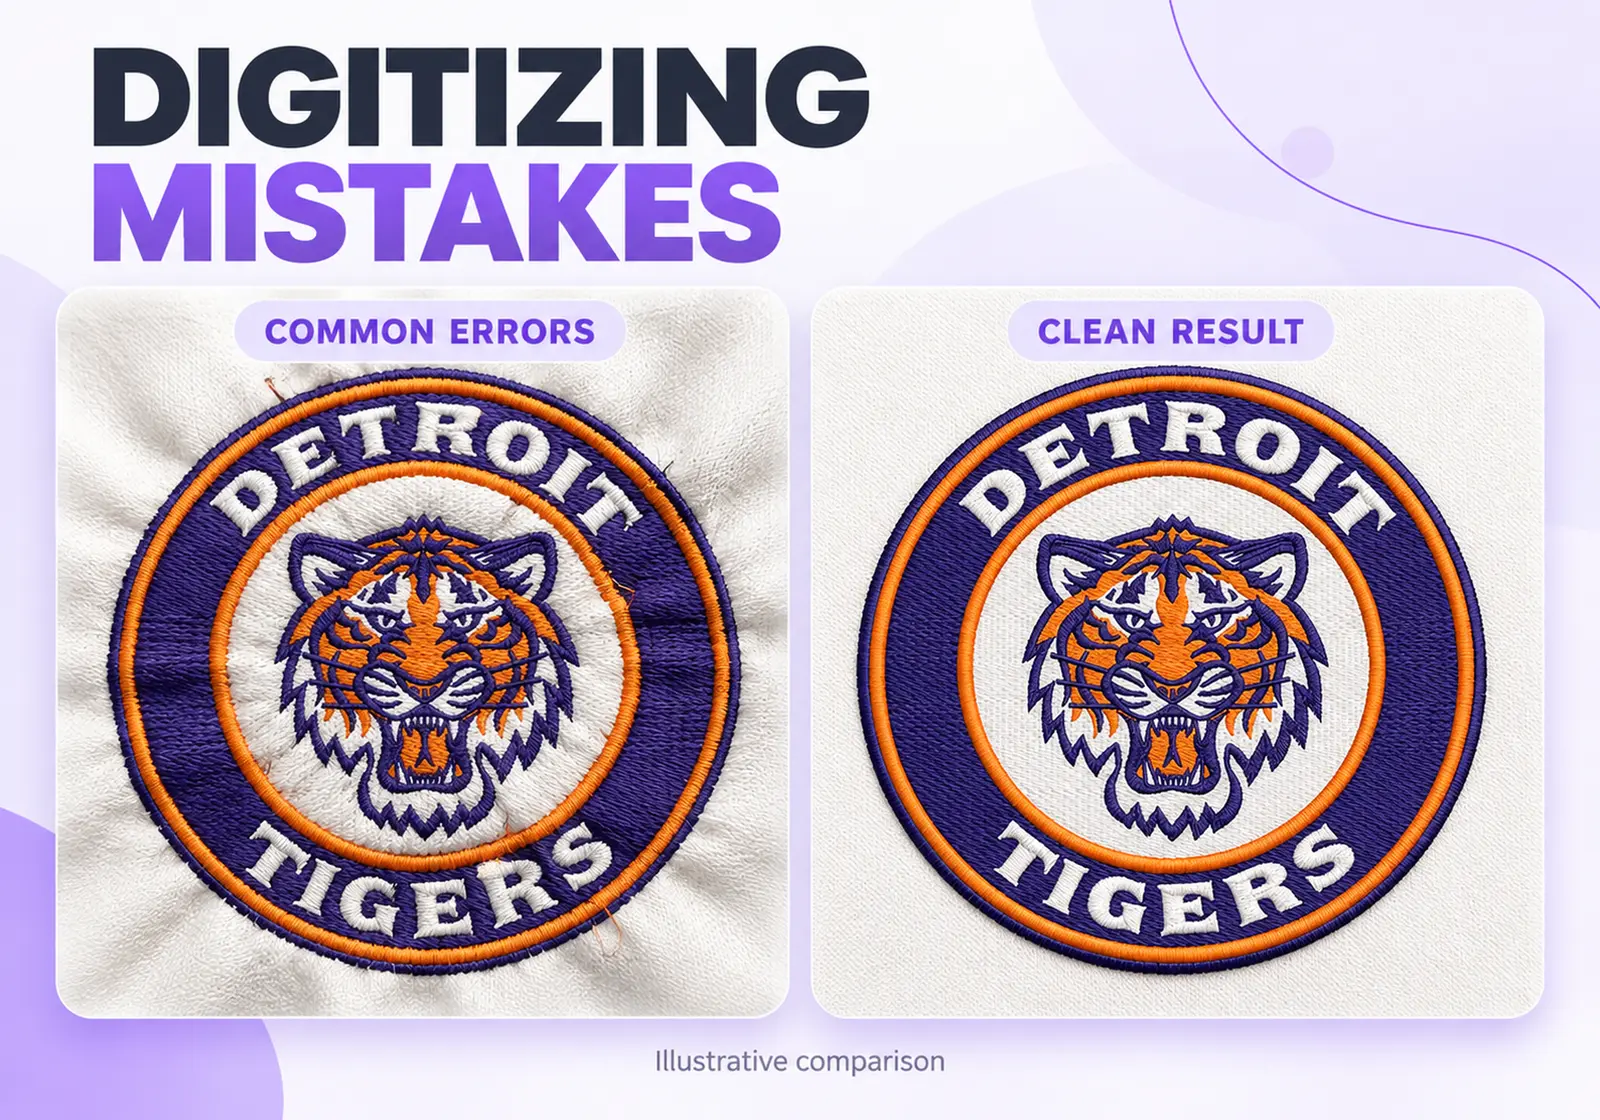
A design may look perfect on a computer screen but produce disappointing results when embroidered. Common problems include fabric puckering, uneven coverage, distorted lettering, thread breaks and misaligned outlines. In many cases, these issues start during the embroidery digitizing process.
Embroidery Digitizing Mistakes can affect stitch quality, production time and the final appearance of a garment. Understanding how underlay, stitch density, pull compensation, stitch sequencing and lettering work together helps embroidery businesses avoid costly production problems.
Here are five common mistakes and practical ways to prevent them.
Underlay stitches create a foundation beneath the visible embroidery. They support the fabric, stabilize design elements and help top stitches maintain their intended shape.
Without suitable underlay, stitches may sink into textured materials, edges can become uneven and fabric may show through the design. However, adding too much underlay can also create bulky, stiff embroidery.
How to fix it:
Remember that stabilizer selection and correct hooping also matter. Underlay cannot compensate for every fabric-stabilization problem.
Learn more in our guide to Embroidery Underlay Types And Applications.
Stitch density refers to the spacing between stitch rows. If stitches are too close together, excessive thread buildup can make the design stiff, increase needle penetration and contribute to puckering or thread breaks.
If density is too low, gaps may appear and the underlying fabric can become visible.
Stitch direction is equally important. Poorly planned angles can cause uneven coverage, distortion and unnecessary fabric movement.
How to fix it:
There is no universal density setting for every embroidery job. A design intended for stable cotton may require different settings from one prepared for fleece, pique or stretch fabric.
Pull compensation accounts for the way thread tension and fabric movement can make embroidered objects narrower than their original digital shapes.
Without suitable compensation, satin lettering may become too thin, circles may lose their intended shape and outlines may no longer align with fill areas.
However, excessive compensation can make letters bulky and close small openings inside characters.
How to fix it:
For example, a company logo with a satin border around a filled shape may develop visible gaps if both objects are not digitized with appropriate overlap and compensation.
Stitch sequencing determines the order in which embroidery objects are sewn. An inefficient sequence can produce excessive jump stitches, unnecessary trims, longer production times and registration problems.
Long travel movements can also leave loose threads that require additional trimming.
How to fix it:
Stitch direction, object placement and sewing sequence should work together. For example, stitching an outline before the fill beneath it may cause the outline to become misaligned after the fabric moves.
Small lettering is one of the most challenging parts of embroidery digitizing. Text that looks readable on screen may become crowded or difficult to recognize once stitched.
Thin letter strokes, tight spacing and small internal openings are particularly vulnerable to thread buildup.
How to fix it:
For many standard embroidery applications, lettering below approximately 5 mm in capital height can become difficult to reproduce clearly. This is a practical warning, not a universal minimum; thread weight, font, fabric and machine setup all influence readability.
Use this table to identify possible causes before changing machine settings or ordering a revised file.
Stitch-Out Problem |
Possible Digitizing Issue |
|---|---|
| Fabric showing through | Insufficient coverage or unsuitable density |
| Stiff, bulky embroidery | Excessive density or underlay |
| Narrow lettering | Insufficient pull compensation |
| Misaligned outlines | Poor sequencing or compensation |
| Excessive jump stitches | Inefficient stitch sequence |
| Blurred small text | Unsuitable stitch type or lettering size |
Not every problem comes from digitizing. Needle condition, thread quality, tension, stabilizer, hooping and machine maintenance should also be checked before deciding that the file needs revision.
A simple quality-control process can prevent many avoidable stitch-out problems.
Before production, check:
Professional Embroidery Digitizing Services help prepare designs with suitable stitch planning, fabric considerations and machine-ready file requirements.
Good embroidery depends on more than attractive artwork. Incorrect underlay, excessive stitch density, poor pull compensation, inefficient sequencing and unsuitable small lettering can all affect the final stitch-out.
By reviewing these five areas before production and testing designs on the intended material, embroidery businesses can reduce avoidable problems and achieve more consistent results.
Need help preparing your embroidery artwork? ART Studio Digitizing provides custom embroidery digitizing for logos, apparel, caps and other applications. Send your artwork, finished dimensions and fabric details to Request A Professional Digitizing Quote.
Send your design. We’ll confirm the price and turnaround before work begins.
Get My Free QuoteFree quote. No account required.
 Grinch Christmas Embroidery Design Bundle – 4x4, 5x7, 6x10, 8x12
 Retro Christmas Trio Embroidery Design – 5x7, 6x10, 8x12
 Disneyland Castle Mickey Bow Sparkle Embroidery Design – 4x4, 5x7, 6x10

