

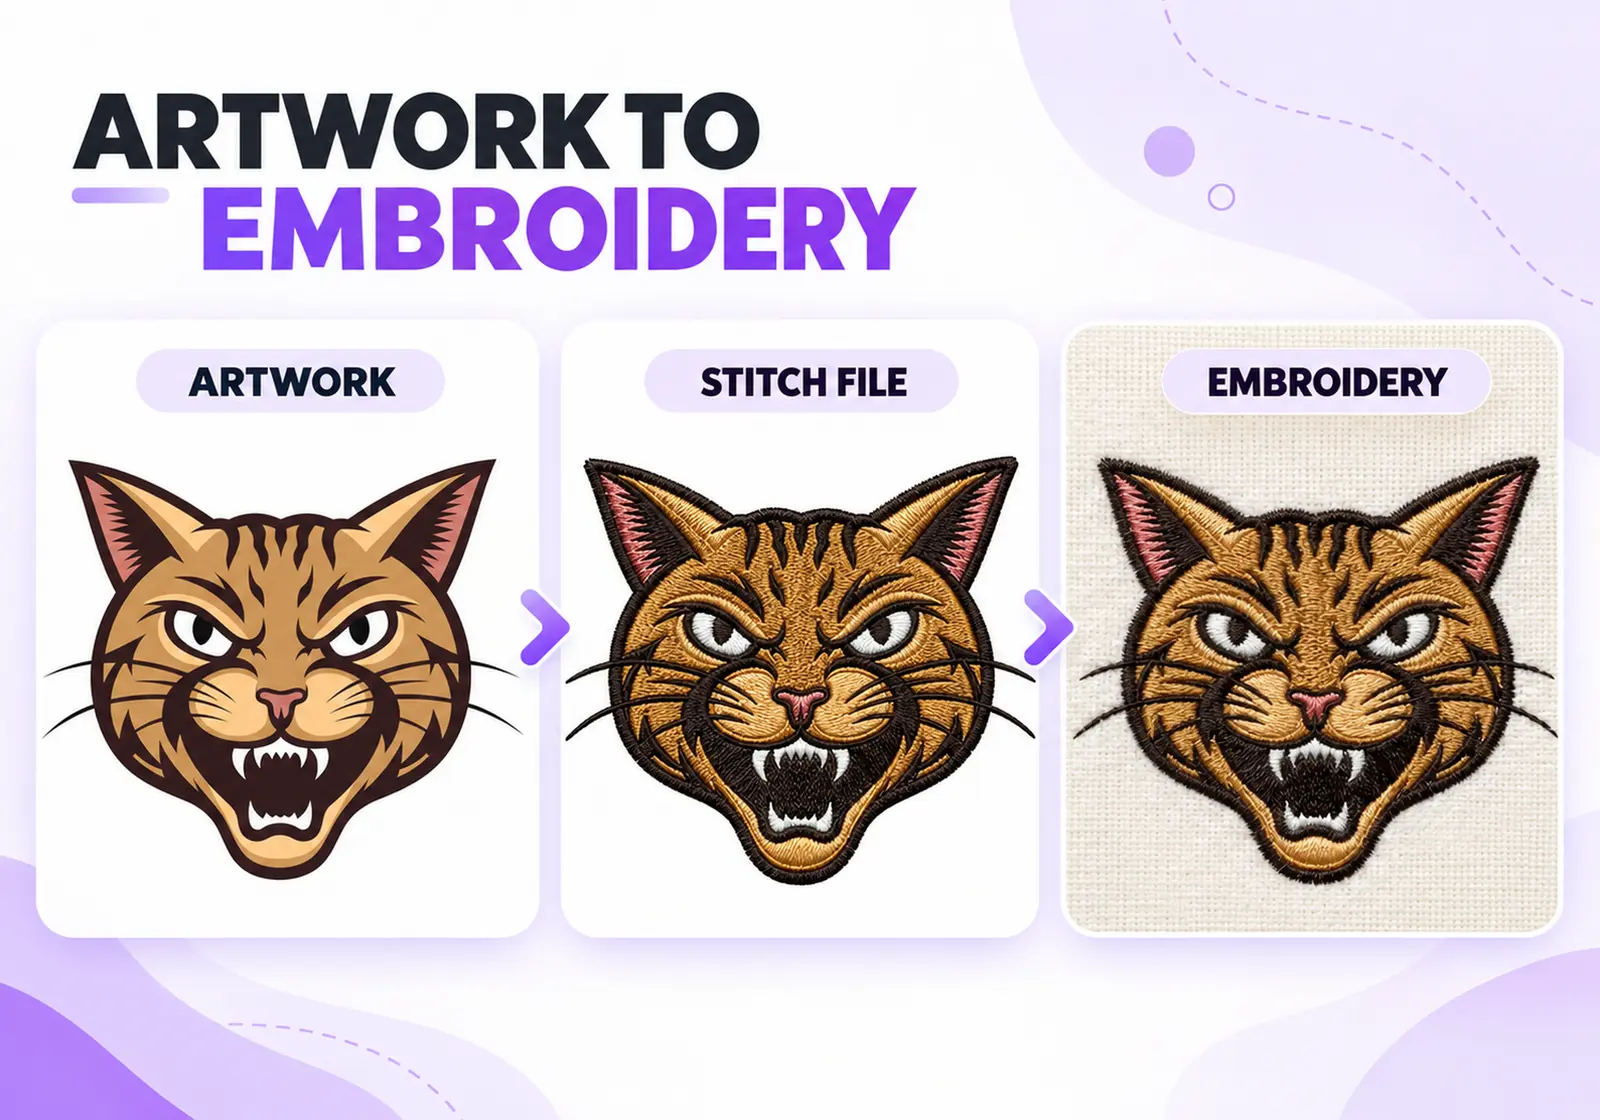

Embroidery digitizing is the process of turning artwork, such as a logo, name or illustration, into stitch instructions an embroidery machine can follow. It is more than converting an image into another file format: a digitizer plans stitch types, directions, density, underlay and sewing order so the design can be embroidered on a specific material and at a chosen size.
Whether you run an embroidery business, prepare branded apparel or want a custom logo stitched onto a garment, understanding digitizing helps you choose the right file and get a better stitch-out.
A digitizer uses specialist embroidery software to build a design from individual stitch objects. Each object is assigned the settings needed for its shape, fabric and placement.
A typical workflow includes:
The test sew-out matters because a screen preview cannot fully show how thread, stabilizer, fabric and machine settings will behave together.
Most designs are built from three fundamental stitch types. The digitizer chooses between them according to the size and shape of each element.
Stitch Type |
Common Use |
|---|---|
| Running stitch | Fine outlines, small details and lightweight lines |
| Satin stitch | Lettering, borders and narrow columns |
| Fill (tatami) stitch | Larger shapes and areas that need thread coverage |
Running stitch follows a line with a sequence of individual stitches. It works well for details that are too fine for wider columns.
Satin stitch forms a zigzag across a narrow shape. It creates a smooth, raised finish for suitable lettering and borders. Very wide columns may need to be split or handled differently.
Fill stitch, often called tatami, covers larger areas with rows of stitches. The digitizer selects an appropriate angle, spacing and underlay to help achieve even coverage without unnecessary bulk.
3D puff is a separate raised technique, not a basic stitch family. Foam is placed beneath selected areas and covered by carefully planned stitching, commonly for bold cap lettering and simple shapes.
Auto-digitizing software can analyse artwork and generate stitch objects automatically. It may be useful for simple graphics or as a starting point, but the result still needs review. Software may not correctly interpret fabric behaviour, small lettering, stitch direction, underlay, pull compensation or sewing sequence.
Manual digitizing gives a digitizer direct control over how individual elements are constructed. The digitizer can simplify details, choose suitable stitch types and adjust settings for the intended fabric, size and placement.
The best approach depends on the artwork and production requirements. Complex logos, small text, caps and specialty applications often need careful manual editing, even when software assists with the initial conversion.
The correct format depends on the embroidery machine, model and software workflow. Common machine formats include:
Format |
Common Association |
|---|---|
| DST | Widely used in commercial embroidery |
| PES | Brother and some Baby Lock machines |
| JEF | Janome machines |
| EXP | Melco and compatible workflows |
| HUS | Certain Husqvarna Viking machines |
| XXX | Some Singer/legacy workflows |
These are common associations, not a guarantee that every model supports every version or feature. Confirm the exact machine model and required format before ordering.
Also, distinguish a machine file from an editable working file. EMB is commonly used as Wilcom’s editable native design format, while DST and PES are machine embroidery formats. A machine file may not preserve all the original editable objects and settings.
For a closer comparison, read our guide to DST, PES And JEF Embroidery File Formats.
Send the clearest original artwork available, preferably a vector file such as AI, EPS, PDF or SVG, or a high-resolution PNG/JPG. Tell your digitizer the finished dimensions, fabric, garment placement, machine model and required file format.
If your logo is blurry or pixelated, it may need vector tracing before digitizing. Vector tracing rebuilds artwork into scalable shapes; it does not create machine stitch instructions. Explore our Vector Tracing Service if your source logo needs cleanup.
The visible top stitches are only part of a good embroidery file. Underlay creates a foundation beneath the top stitching and helps support the fabric and design. Stitch density controls how closely stitch rows sit together, while pull compensation adjusts object dimensions to account for fabric and thread movement.
These settings are not universal. The right choices depend on the fabric, stabilizer, design size, stitch type and machine setup. Incorrect settings can contribute to gaps, puckering, stiff embroidery or distorted shapes. Learn more in our guide to Embroidery Underlay Types And Uses.
Consider professional digitizing when you need a logo prepared for production, small lettering, detailed artwork, cap embroidery, appliqué or 3D puff. A professional digitizer can plan the stitch construction for the intended application instead of relying on a simple image conversion.
ART Studio Digitizing provides custom Embroidery Digitizing Services for logos, apparel and specialty applications. Share your artwork, finished size, fabric and machine format so the requirements can be reviewed before production.
Embroidery digitizing turns artwork into a practical set of stitch instructions. The quality of the result depends on suitable stitch types, underlay, density, pull compensation, sewing order, file compatibility and testing. Providing clear artwork and accurate production details helps your digitizer prepare a file that is better suited to the final embroidery job.
Send your design. We’ll confirm the price and turnaround before work begins.
Get My Free QuoteFree quote. No account required.
 Grinch Christmas Embroidery Design Bundle – 4x4, 5x7, 6x10, 8x12
 Retro Christmas Trio Embroidery Design – 5x7, 6x10, 8x12
 Enemies to Lovers Book Club Embroidery Design | Dagger Anatomical Heart Sparkle | BookTok Romance Reader Design

